Make (Formerly Integromat)#
With over 500,000 active users and more than 1,000 app integrations, Make has established itself as one of the leading automation platforms for businesses worldwide. Originally launched in 2012 under the name Integromat in Prague, the platform was acquired by Celonis in 2016 and later rebranded as Make.
Scenarios & Templates#
Make allows users to build automated workflows, known as scenarios, which connect a wide variety of services and applications. These scenarios are constructed visually, using a powerful drag-and-drop canvas that enables non-technical users to build complex automations without writing code. While platforms like n8n offer self-hosted solutions and native code execution, Make stands out with its fully cloud-hosted model, providing scalability and ease of access right out of the box.
Scenarios can be published on Make’s public creator directory as templates, allowing other users to leverage complex workflows with minimal setup. Make’s templates directory fosters a community-driven approach to automation, where users can share their workflows and benefit from the collective knowledge of the Make user base.
Using 1Shot API with Make#
Add 1Shot API nodes to your Make scenarios or templates to manage wallets and transaction history, as well as read from and write to smart contracts on any EVM-compatible blockchain. Since 1Shot API is a verified Make Technology Partner, you simply search for “1Shot API” in the module directory when adding a new module and select the appropriate function for your scenario.
Authentication#
The first time you add a 1Shot API node to a Make scenario, you will need to authenticate it against your 1Shot API account. Click on the node, then click “Add” under the “Connection” field. You will enter an API key and secret as well as your business ID (located at the top right corner of your 1Shot API dashboard) and then click “Save”.
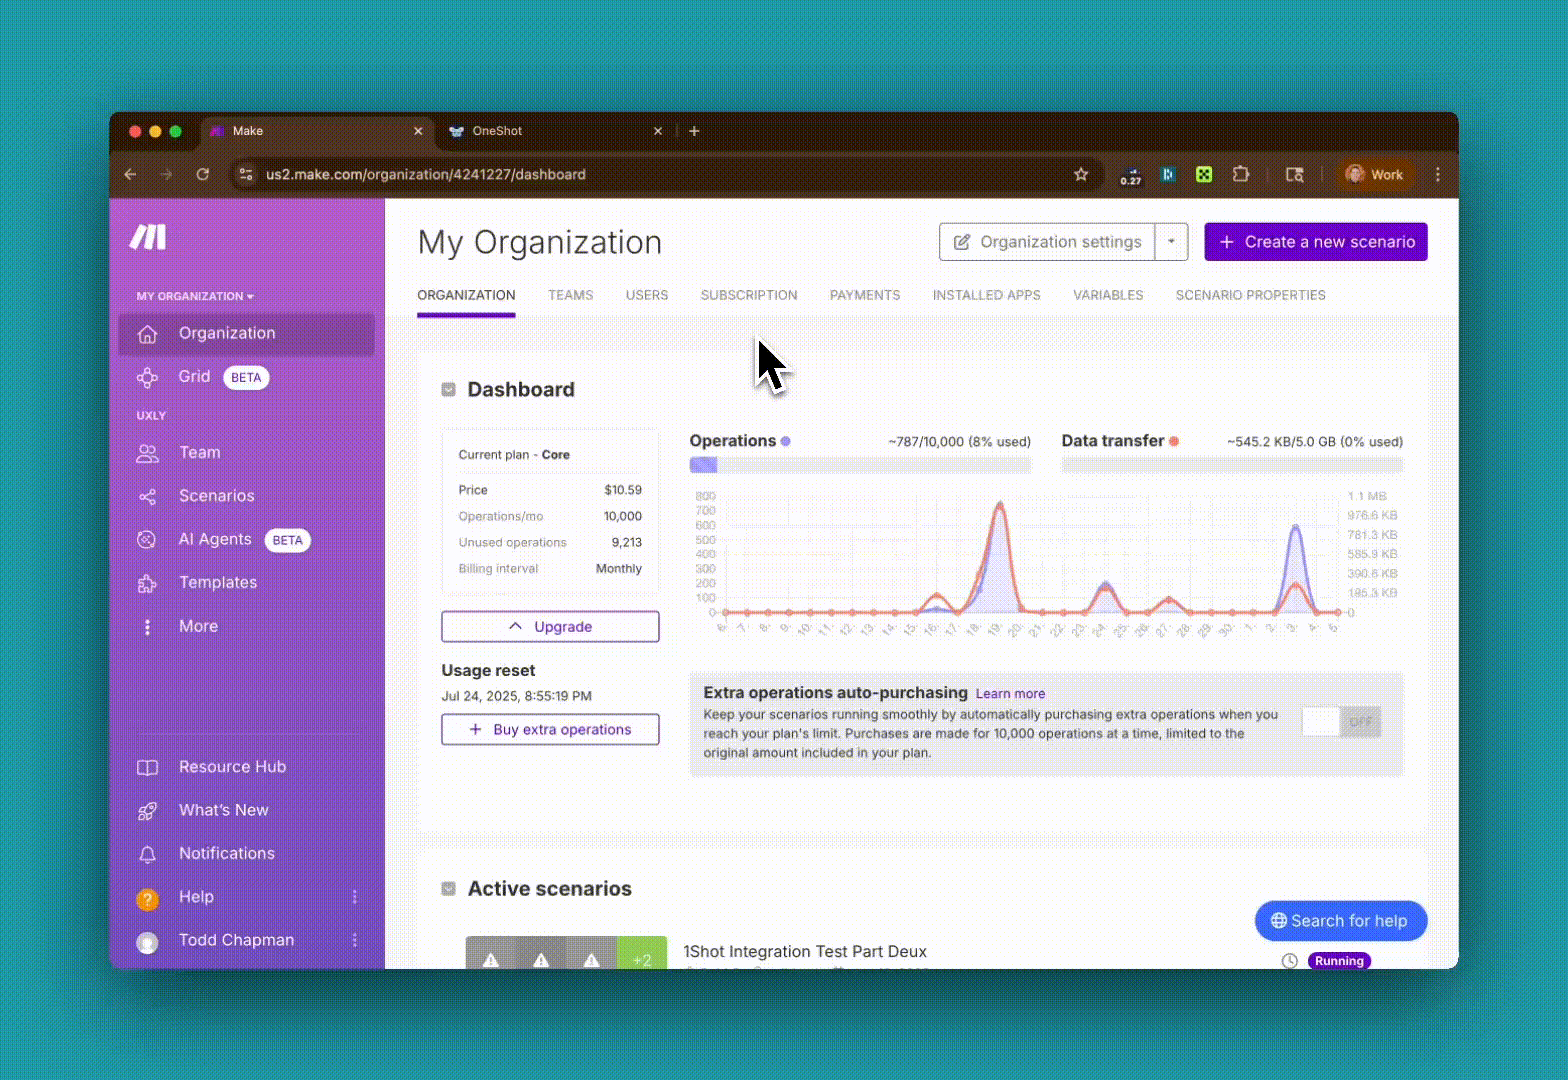
Monetize Make Scenarios with x402#
Using 1Shot API’s x402 Gateway for Make template, you can monetize any Make scenario using the x402 payment protocol. Start by importing the blueprint into a new scenario in Make. Then create a webhook to receive x402 payment requests (give the webhook a unique name so you can remember what it was for). Once you have imported the blueprint, be sure to configure an authentication connection so that the 1Shot API nodes can communicate with your 1Shot API account.
Payment Configuration#
Important
Don’t forget to provision a 1Shot API wallet on the target blockchain network where you want to accept payments. Put sufficient gas funds into the wallet to cover the transaction costs of your payment transactions.
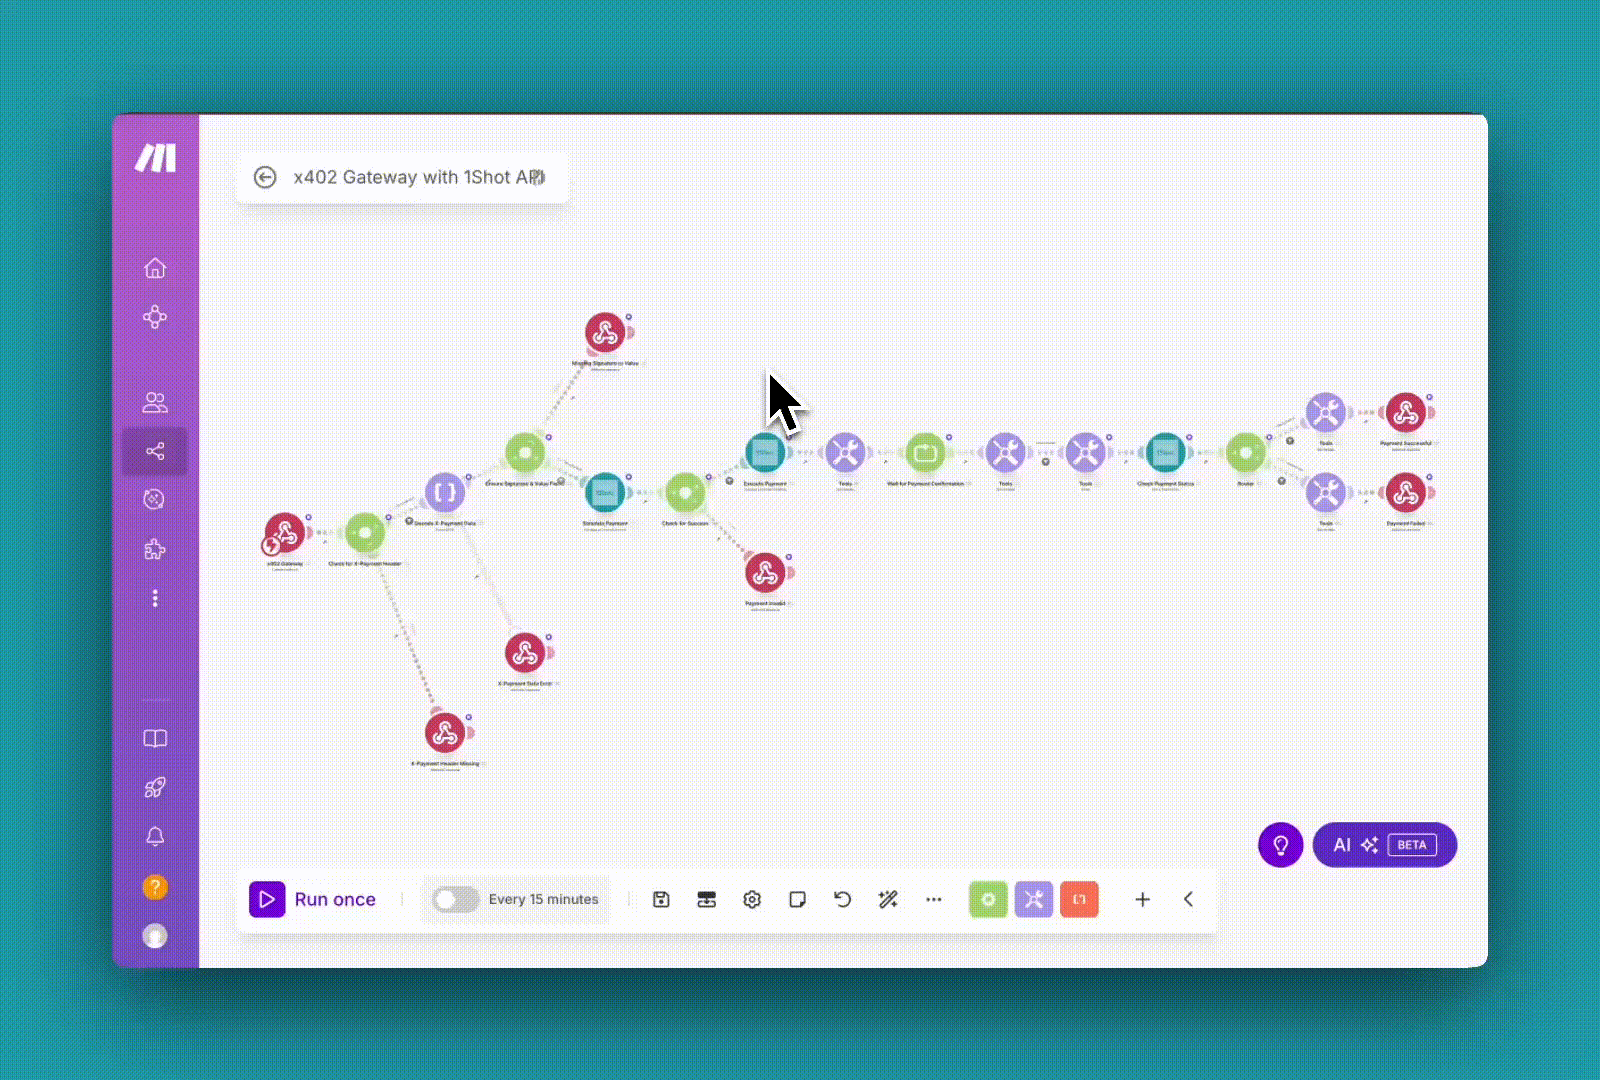
There are two configurable quantities for you x402 Gateway: the payment token and the price of the service. You can change the price enforced by the gateway by clicking the filter just before the payment simulation node and changing the value condition. In the Simulate and Execute nodes, select the appropriate smart contract method id for the token you are trying to accept as payment. The ERC-20 must implement a transferWithAuthorization method (as is the case for the USDC token) to be compatible with x402. Import the appropriate smart contract method in “My Smart Contracts” in the 1Shot API dashboard, and then select it in both of the 1Shot API nodes.